Prepare the Car: Create Your Course
Now, the road trip is planned, you have everything ready to create your course and assignments. Well, let’s prepare the car, your Mobius SLIP Course.
let’s prepare the car, your Mobius SLIP Course.
Create the Course Shell
Sign in to your instructor account, app.mobiusSLIP.com
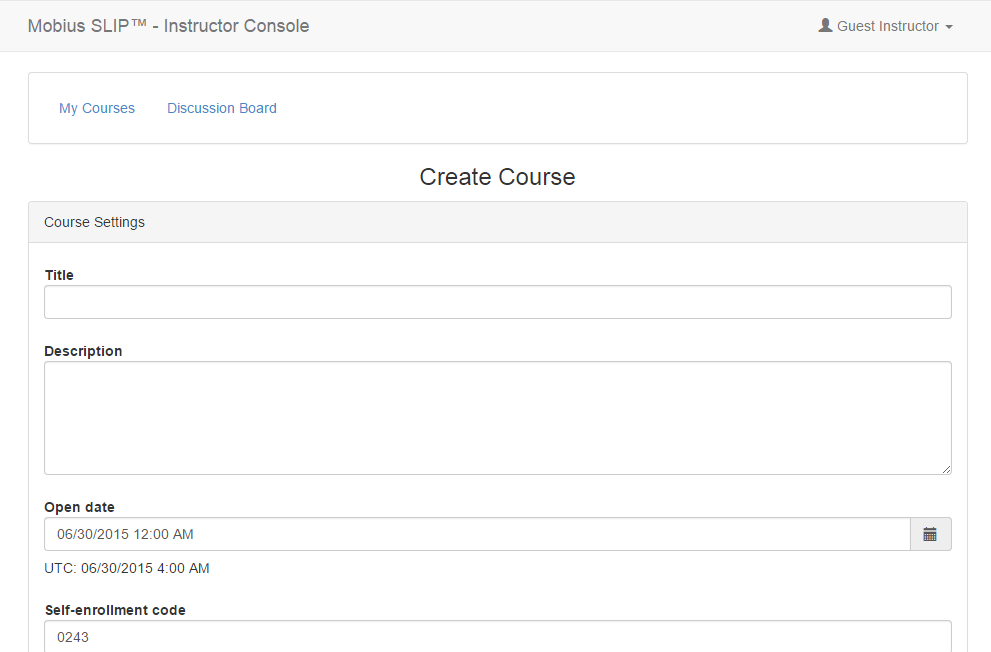
From the My Courses page, click Create New Course, the Create Course page displays.
Enter the information created in the Planning stage in the fields here. The information may be updated later.
Title
Enter a title that is descriptive of your course. You may type a title or copy and paste it from a course catalog. Use a phrase to uniquely identify the course section and semester and year if possible. For example, BUS-105-01–Business Policy–Fall 2015.
Description
Enter a description for your course. We recommend the description on your syllabus or in the course catalog.
Open Date
The course will open on this date. If the students have been enrolled via roster upload, they will be sent an automated email. If they are to enroll themselves, they may begin doing so on this date. It is best practice to set this date for sometime around the start of the semester, allowing enough time between then and the first Submission deadline for the students to enroll and access their first assignment.
Self-enrollment code (and other enrollment methods)
The default method of Course Enrollment is using the student self-enrollment code. Alternatively, you can upload the student roster as a spreadsheet or students can log in using their university LMS credentials. These methods are not mutually exclusive; however, it is best to choose one method and stick with it.
If you choose student self-enrollment, the code will be set here. You may keep the randomly generated code or create your own.
A custom code should be:
- Up to 10 alpha-numeric characters, case sensitive
- Used only once
- Logical Naming Convention. One recommendation is the course+semester+section combination. Example: BUS105Fa01.
- Shared only with students in your section of the course. If you use Mobius for multiple sections, please share each course code with their respective section only.
- Provided as early as possible to your students.
If you would like to enroll your students via Roster Upload, you can disable self-enrollment or not, it depends on your preference. There is no harm in leaving the option enabled when using roster upload.
To disable the feature, simply delete the self-enrollment code.
Link
Mobius SLIP generates permanent link to the course that you may post to your LMS or email to students.
Display Cumulative Performance
This check box controls whether students see their cumulative performance listed on their Summary page. If turned on, each student will see their cumulative grade, total points, z-score, percentile rank, the class average and standard deviation of total points, as calculated by Mobius. Put a check in the box if you wish for your students to see these statistics; if not, then simply leave it blank.
Save your Course
Now that you have entered the course information, click Save. Changes can be made at any time, via the Course Settings tab.